Hi friends, who’s ready to talk Christmas trees? Over the years we’ve had real and fake and then real and then fake again. But today I’m talking about a smaller Wooden Christmas Tree for your porch.
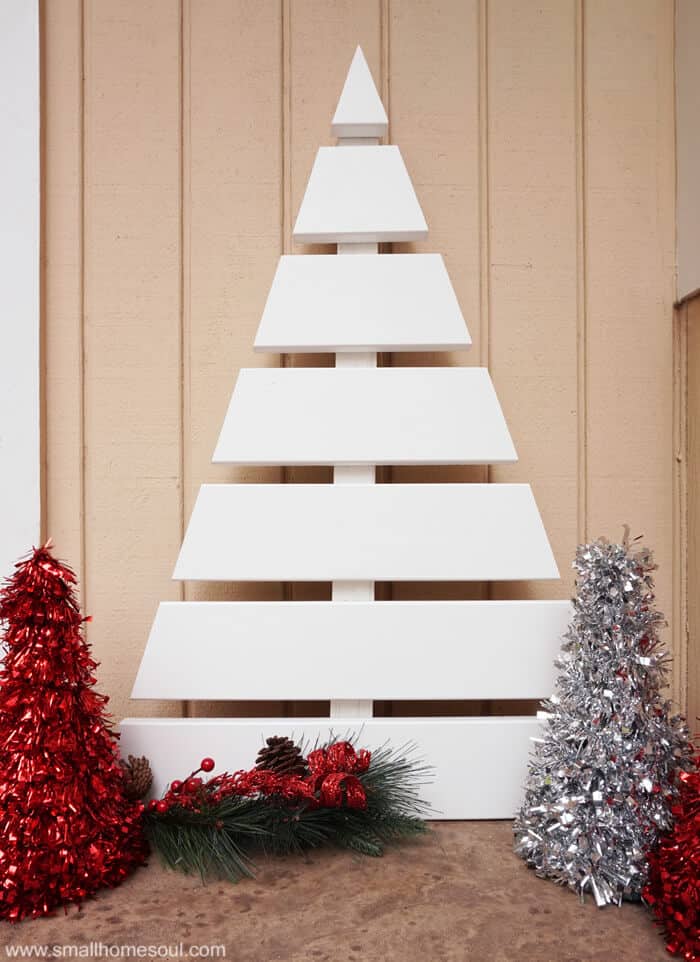
You can make this project fast and from any scrap wood or trim board you have laying around. And yes, you can even use pallet wood to create your wooden Christmas Tree.
I created this as part of a trash to treasure project with some of my blogging friends and I’m excited to share it with you today. The concept is to use something that’s no longer wanted and turn it into something useful.
My husband and I were cleaning up the side yard a few weekends ago and as he was throwing scraps into the garbage bin I’m thinking to myself “but wait, I can make something out of that.”
He is surely tired of hearing me say stuff like that so I kept it to myself (this time LOL). Then the next morning I went dumpster diving and got busy.
This page contains links to products, if you purchase something after clicking on my link I may earn a small commission (at no extra cost to you). You can read about affiliate links here.
Wooden Christmas Tree Supply List
- Scrap wood or pallet material
- Straight Edge
- Carpenter’s Square
- Pencil
- Miter Saw
- Cordless Drill
- Exterior Screws
- White Paint, if desired
- Painter’s Tape
Making the Wooden Christmas Tree
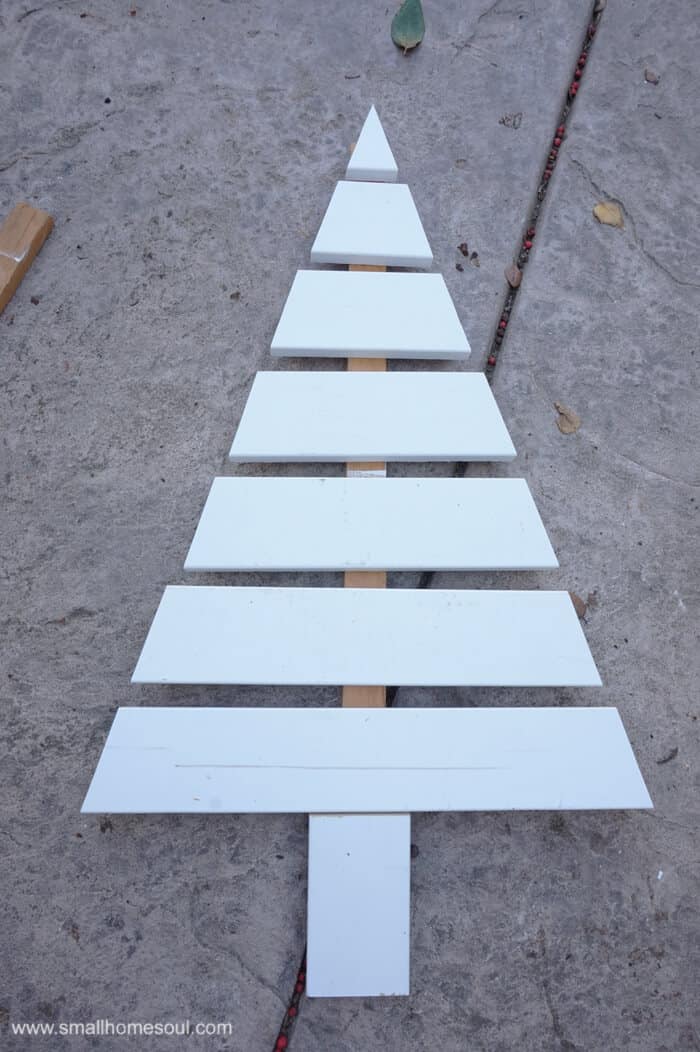
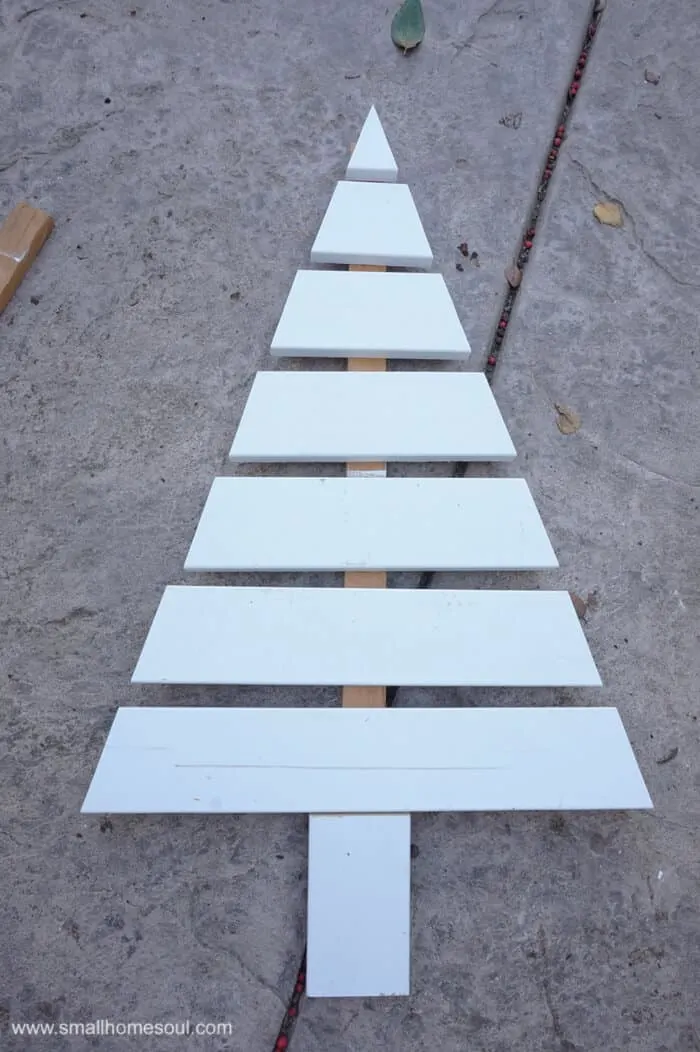
Step 1: Determine the size for your tree
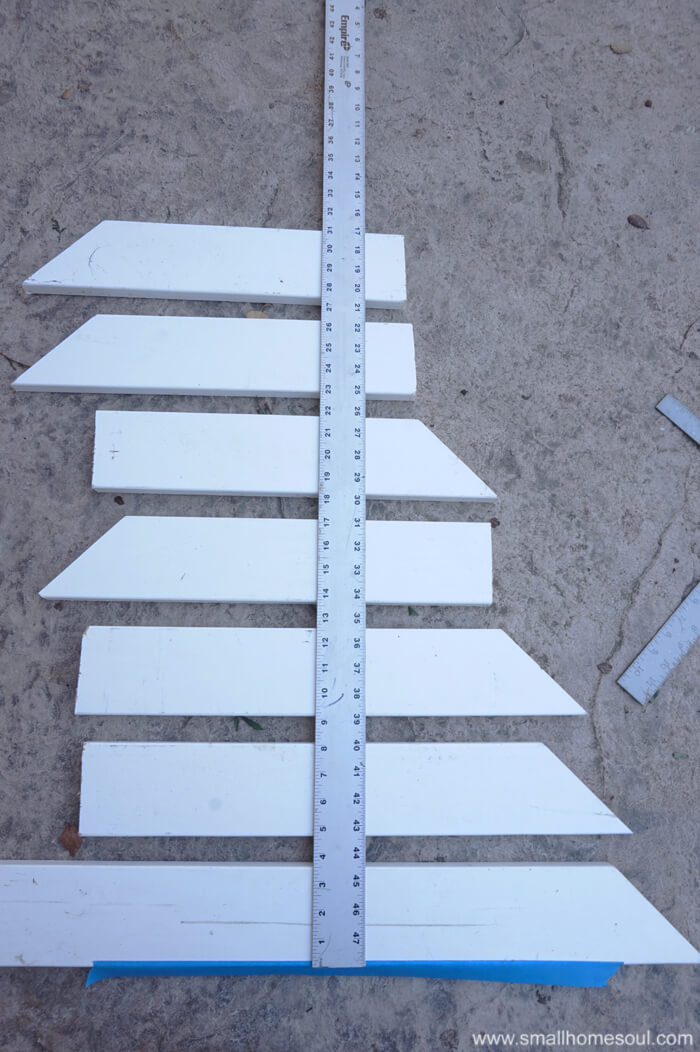
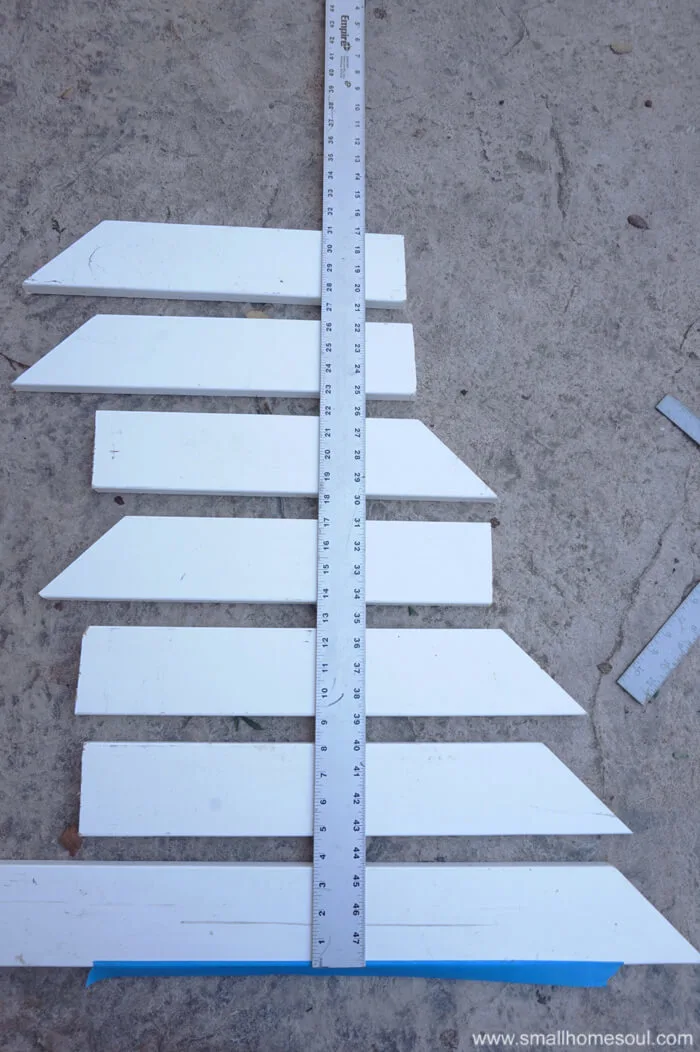
You can make your tree as tall as you want by spacing your boards closer together or farther apart. My tree is 30″ tall by 20″ wide
Step 2: Laying out the Wooden Christmas Tree design
- Pull out all your pieces of scrap 1×4 wood.
- Arrange them according to size.
- To the bottom board attach a 20″ wide piece of blue painters tape with a mark in the center at 10″.
- Working from the bottom up use a piece of the scrap 1×4 wood on edge to set the spacing between each board.
- Use a straight edge and a carpenter’s square to mark the point on the very top board. It should align to the mark on the bottom board made on the painter’s tape.
Step 3: Mark the boards for cutting
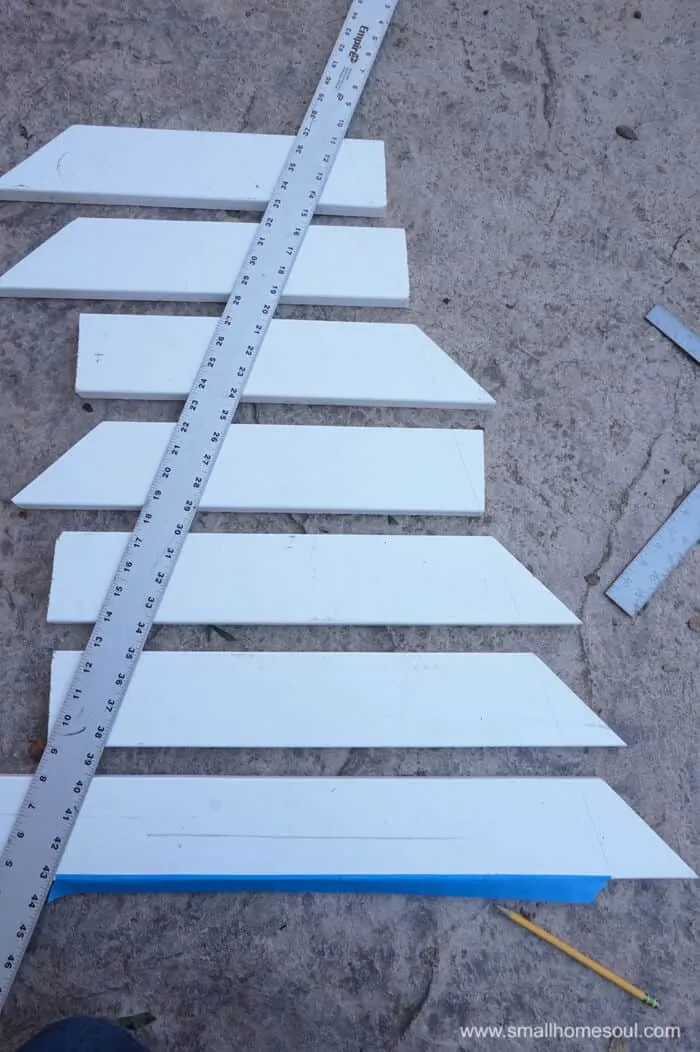
- Next line up the straight-edge to the marks at the tip and the bottom right edge of the blue tape.
- Pressing down on the straight edge carefully drew a line across all the boards to mark the boards for cuts.
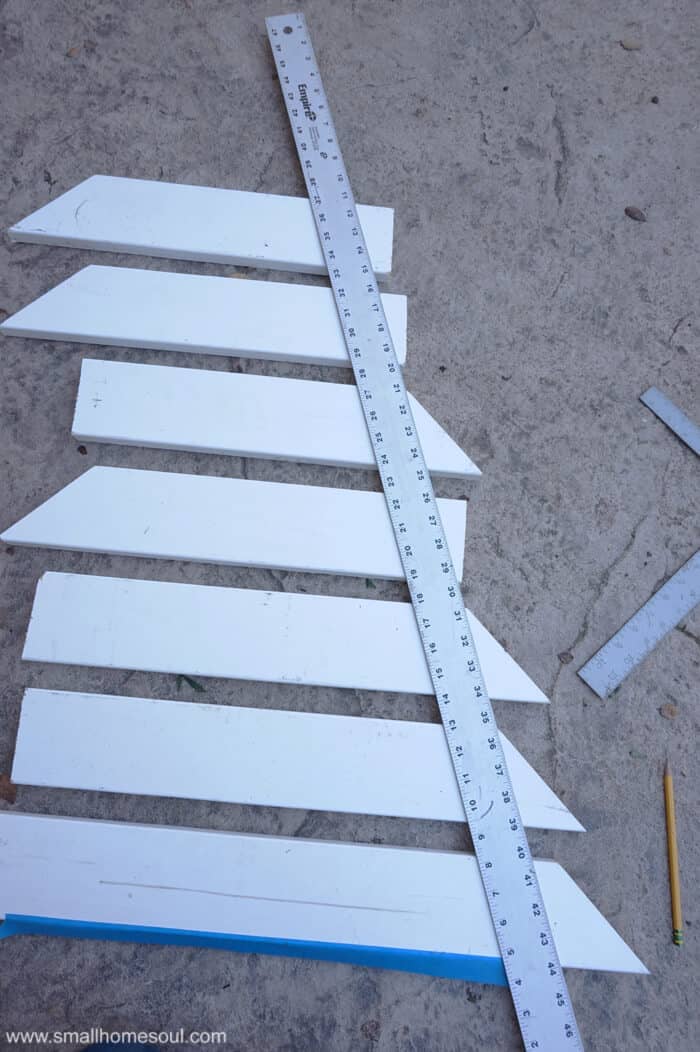

- Repeat the same steps on the left side.

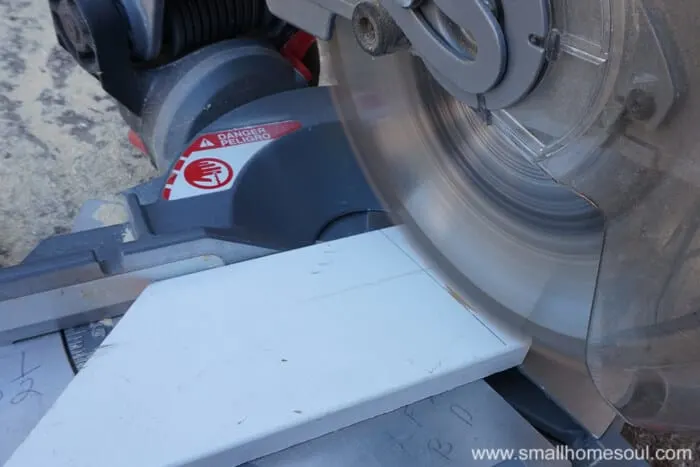
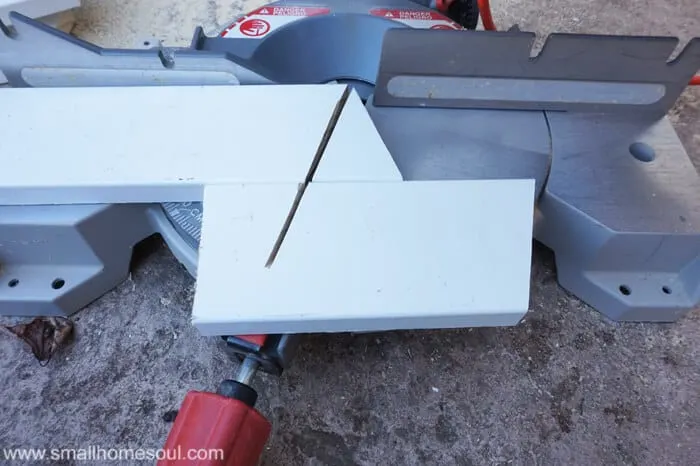
Step 4: Cut the Christmas tree branches
You’ll need to use a Miter Saw, circular saw or a jigsaw to make the cuts.
- Adjust the base of the miter saw a little at a time until the blade is lined up with the pencil mark.
- Make a test cut about 1/4″ on the outside of the line and adjust the blade until your test cut is aligned with the pencil mark.
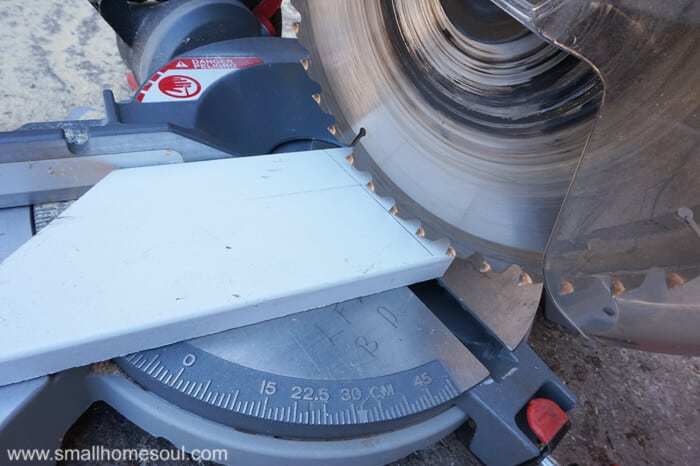

- Go slowly until your blade just barely marks the surface of your board as shown below.
- Actually, this isn’t fine furniture so if your cut is off a little no one will know, it’ll be our little secret.

With nearly all the boards cut I was stumped for a minute about how to cut the small tree top keep my fingers attached to my hands 🙂 I joke, but power saws are serious business, I can’t stress this enough.
Use a longer piece of scrap to hold the shorter piece for the point in place while you cut.
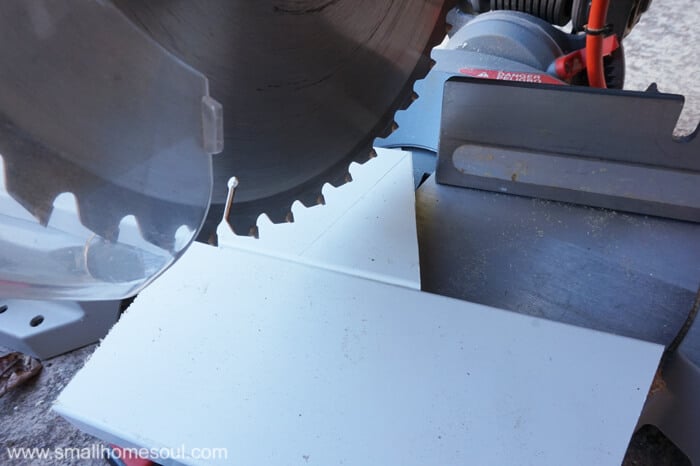
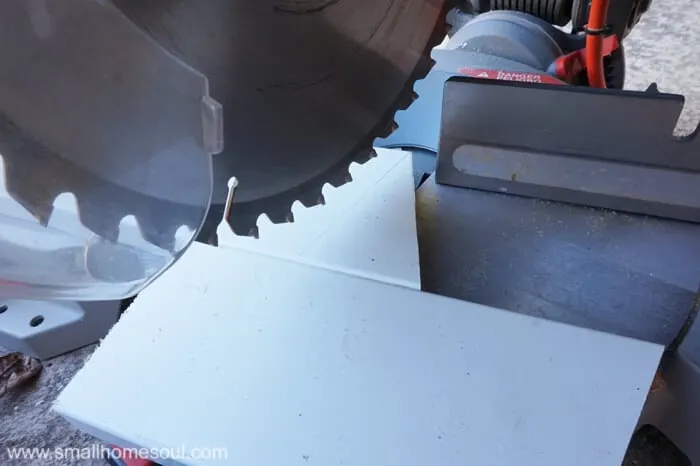
Hold the bottom piece closest to you firmly against the piece for the point and cut carefully. In my illustration I held the boards with my right hand and operated the miter saw with my left.
You could reverse this to operate the saw with your right hand. Success, and I still have all my fingers! Seriously, safety first at all times.

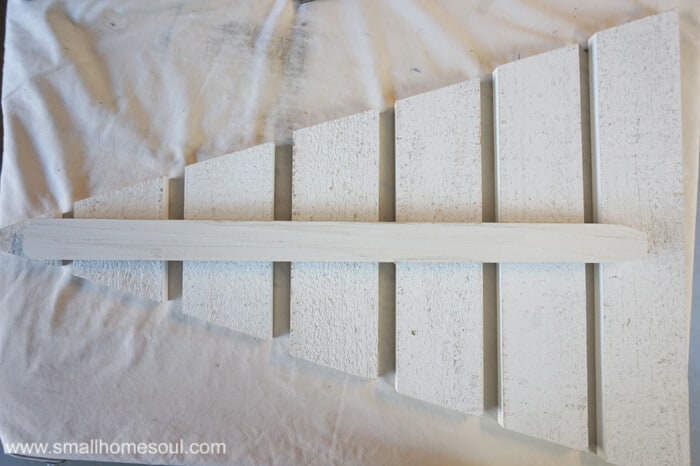
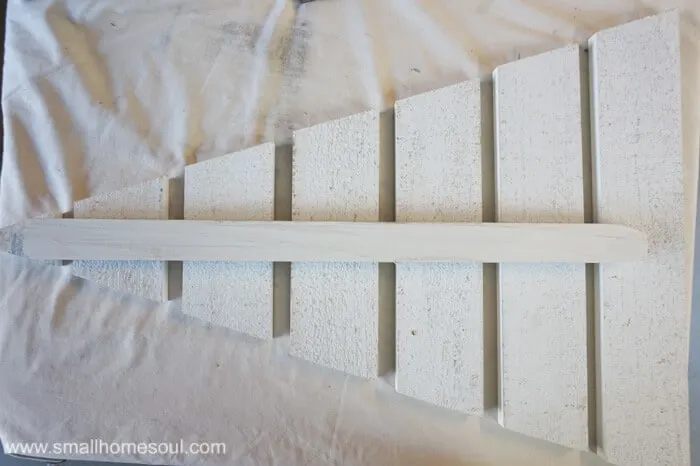
Next I grabbed another piece of scrap and did a dry fit of my pieces.
Cut a 1×2 for the trunk of the tree (mine is 28″ long). Cut a point at one end.
Cut an additional square piece of wood for the trunk. This is optional, I decided not to give mine a trunk afterall.
Step 5: Paint the parts of the tree
My scrap wood was primed so I just hit all the raw edges with some white chalk paint. You can paint your individual pieces before assembly or after.
Assembling Your Wooden Christmas Tree
Step 6: Assembling the tree
- On a flat surface lay out the boards in order face down as shown below.
- Use the piece of scrap spacer again between each “branch” and attach the scrap trunk with two screws per board with a cordless drill. and 1-1/4″ screws (Sorry, I forgot to take pictures of the attached screws.)
- Pre-drill your holes so the screws don’t split the wood.
MORE WOODEN CHRISTMAS PROJECTS
Small Wood Signs – Santa Stop Here Sign
Colorful Wood Christmas Decor
I’ll share a secret, I had to attach the trunk 3 times. The first time I attached it with the rough side facing the front (seriously frustrating).
The second time I had my spacing wonky and ran out of trunk when I got to the top piece. Well, thankfully the third time was the charm so please learn from my frustrating lesson 🙂
As I mentioned before, I decided not to use the bottom trunk because it would be too hard to prop the tree against a wall. I like it better sitting on the ground anyway.
Here’s what it looks like on our back porch with some cute tinsel trees and a few Christmas picks.
Didn’t it turn out great? I hope you love it as much as I do and are inspired to make your own wooden christmas tree! There are so many design options you can play with to make them uniquely yours.
Thanks for stopping by and don’t forget to pin this to your favorite Christmas Board.
LOVE IT, PIN IT!!


Marjan
Saturday 17th of December 2016
What a cute idea! And yes one can never be care full enough with power tools. Thanks for visiting celebrate the season! Merry Christmas.
Toni Harvey
Tuesday 20th of December 2016
Thanks Marjan, I'm so happy so many people like that little tree from scraps.
Katrin
Sunday 11th of December 2016
I love it, it's beautiful! just my style and it looks beautiful anywhere in the house I'm sure! Thank you so much for sharing this with us at Sweet Inspiration this wek!
Toni Harvey
Tuesday 13th of December 2016
Thanks Katrin, I do have it in the house now :)
FLORENCE @ VintageSouthernPicks
Wednesday 7th of December 2016
That is so cute Toni! I'm always seeing discarded wood on the side of the road! I like your tree, and especially the way you have it displayed amongst the reds and greens. Florence from Blogging Fifty
Toni Harvey
Wednesday 14th of December 2016
Hi Florence, thanks for visiting. I'm so glad you like it, yes so much opportunity for cute stuff with wood that would otherwise go in the land fills. I'm on the lookout for more scraps so I can make more for next year. They store flat so they won't take up much room at all.
Susie | Chelsea Project
Tuesday 6th of December 2016
OK. I need one ---or three----or six of these. In several sizes, please. It's totally cute and perfect for so many types of decor. Well done, Toni!!
Toni Harvey
Wednesday 14th of December 2016
Thank you Susie, yes I surely need more than just one of these. I wish now I'd made a smaller one with all the tiny scraps.
Kellie
Tuesday 6th of December 2016
Toni, these are so fun!! We made a bunch like this for our church...I wish we had this post before we started!!
Toni Harvey
Wednesday 14th of December 2016
Hi Kellie, thanks so much I bet the ones at your church look great! My brother who works in the hardwood floor business told me my instructions were great, so that's the best compliment a girl can get from her big brother :D