Have you ever participated in an Ornament Exchange? Yes, of course you have because who hasn’t at one time or another #amiright. Have you ever participated in one where you’ve never ever met the person? That’s a little intimidating and that’s where the story of the Easy Christmas Tassel Ornament begins.

So I signed up for an online Ornament Exchange with a group of talented bloggers. We were paired up with someone who has a similar Christmas decorating style as our own, but whom we’ve never met. I had a description of her decorating style to go after a few email exchanges and not much else to go on. Since it sounded like we had very similar style I decided I’d make something I’d love hanging on my own tree.
I was paired with Roseann from This Autoimmune Life because we both love decorating with Red, White, and Silver. I received a beautiful ornament from Roseanne last week and I can’t wait to hang it on my tree It’s big and red/white/silver and it’s fantastic. Links to all the bloggers are below and you’ll find direct links to their projects in the images at the bottom of the post.
Keep reading below to see my tutorial.
This is my first year participating in the Ornament Exchange & Blog Hop! (2017 edition) and there are 47 amazing bloggers participating in the exchange. The rules of the challenge were simple: be partnered with a fellow blogger, create a handmade ornament for $15 or under, create a tutorial, and ship the ornament off to a new home! Done, Done, and Done 🙂

Meet the 2017 Ornament Exchange Hosts
Erlene ⋅ My Pinterventures Kim · Made In A Day Amanda · Domestically Creative
Shirley · Intelligent Domesticatons Michelle · Our Crafty Mom
Beverly · Across the Blvd. Christene · Key to Inspiration Pili ⋅ My Sweet Things
Nicki · Sweet Parrish Place Megan · C’mon Get Crafty
Hilary · Raising Fairies and Knights Emily · Two Purple Couches
Tina · One Crafty Mess Marie · The Inspiration Vault Debra · Shoppe No. 5
Trisha · Rosewood and Grace Jeanie · Create and Babble Katrin ⋅ Kreativ K
Terri · Christmas Tree Lane Maureen · Red Cottage Chronicles
Toni ⋅ Small Home Soul Ula ⋅ Lulu & Celeste Sue ⋅ A Purdy Little House
Pamela · Home On The Corner Lorelai ⋅ Life with Lorelai Cindy ⋅ DIY Beautify
Debbie ⋅ Tweak and Style Stephanie ⋅ Swoodson Says Chelc ⋅ Inside the Fox Den
Susan ⋅ Super Mom – No Cape! Molly ⋅ Just a Little Creativity
Roseann ⋅ This Autoimmune Life Angela ⋅ Simply Beautiful by Angela
Vicki and Jenn ⋅ 2 Bees in a Pod Joanne ⋅ Our Unschooling Journey
Tylynn ⋅ Bitterroot DIY Sam ⋅ Raggedy Bits Mary ⋅ The Boondocks Blog
Cyn ⋅ Creative Cynchronicity Dione ⋅ Clever Chameleon Quilting
Erica ⋅ Erica Ever After Chelsea ⋅ Love Paper Crafts Evija ⋅ From Evija with Love
Samantha ⋅ Little Bits of Home Hope ⋅ Hopes Crafty Niche Anne ⋅ Orange Bettie
Pam · P.S. I Love You Crafts
This post contains links to products, if you purchase something after clicking on my link I may earn a small commission (at no extra cost to you).
Easy Christmas Tassel Ornament Supplies
- 1 Skein Red Sparkle Yarn
- 1/2″ Pearl Beads (3 per Ornament)
- Similar to the smallest size in this set
- Embroidery Needle
- Needle Threader
- Scissors
- 2-5/8″ Wide Cup for Wrapping Yarn (I used a child’s tupperware tumbler) HAHA, I found them on Amazon but they are wayyyy overpriced
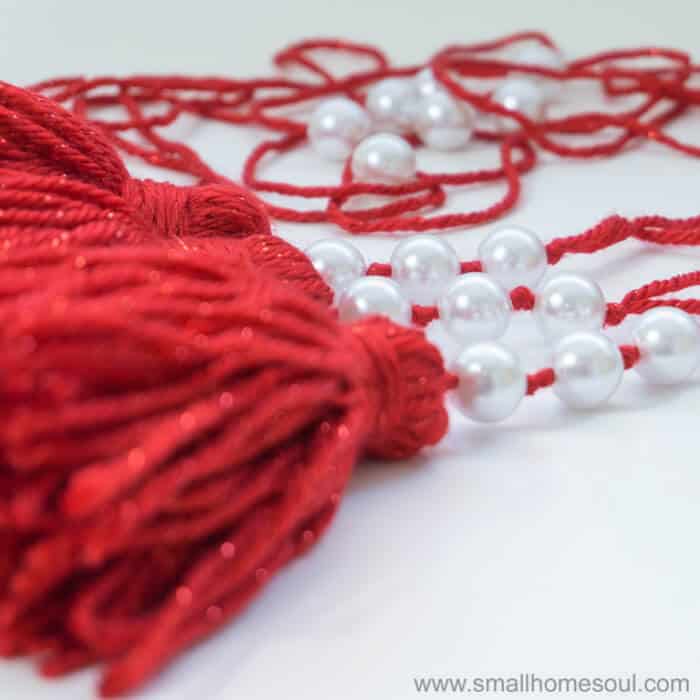
To make your own tassel ornaments we’ll start by making the loops that your ornament will hang from.
- Cut a 24″ piece of yarn (you can cut off excess later) and thread the embroidery needle.
- Thread the needle through all three of the Pearl Beads and push them toward the end of the yarn.
- Keeping a loop above last Pearl Bead you threaded run the needle back through the three beads.
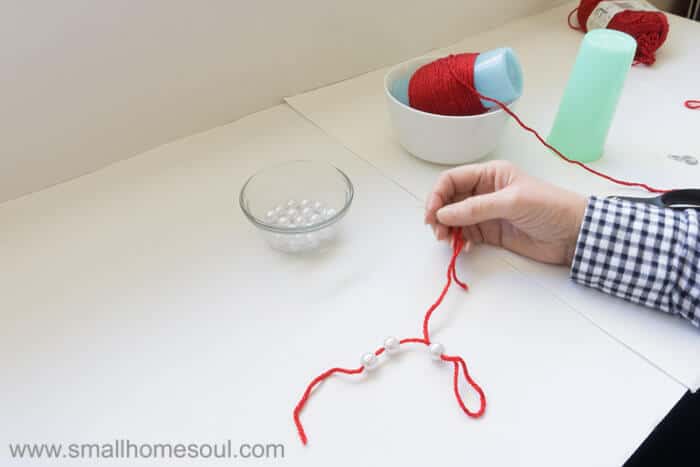
- Leave the needle threaded on the yarn, we’ll use it in a bit.
- Putting a finger into the loop make both ends of the yarn even.
- Tie a knot at the top of the loop about 2″ from the top.
- Slide one pearl bead up to the knot and make a second knot below the 1st Pearl Bead.
If you slip the needle into the loop of the knot (shown above) you can slide the knot close to the Pearl Bead before tightening.
- Continue making knots until you have a knot above and below all beads.
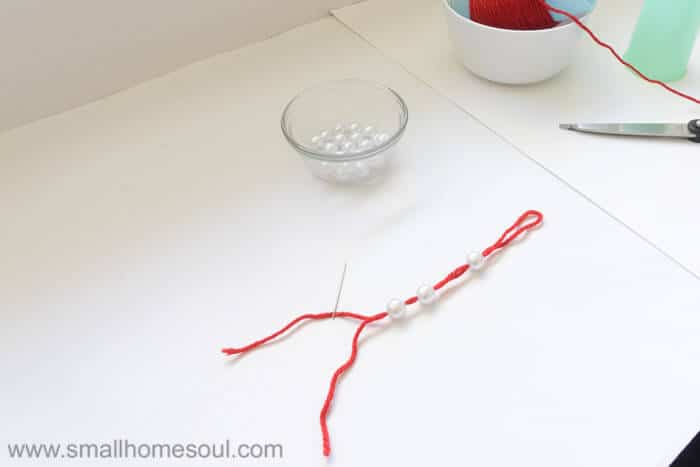
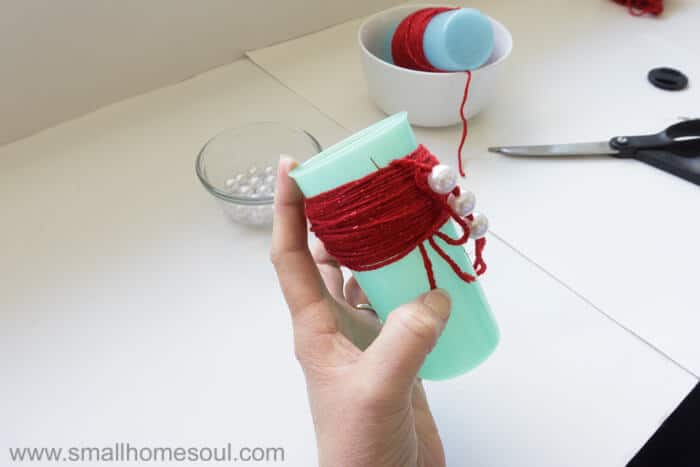
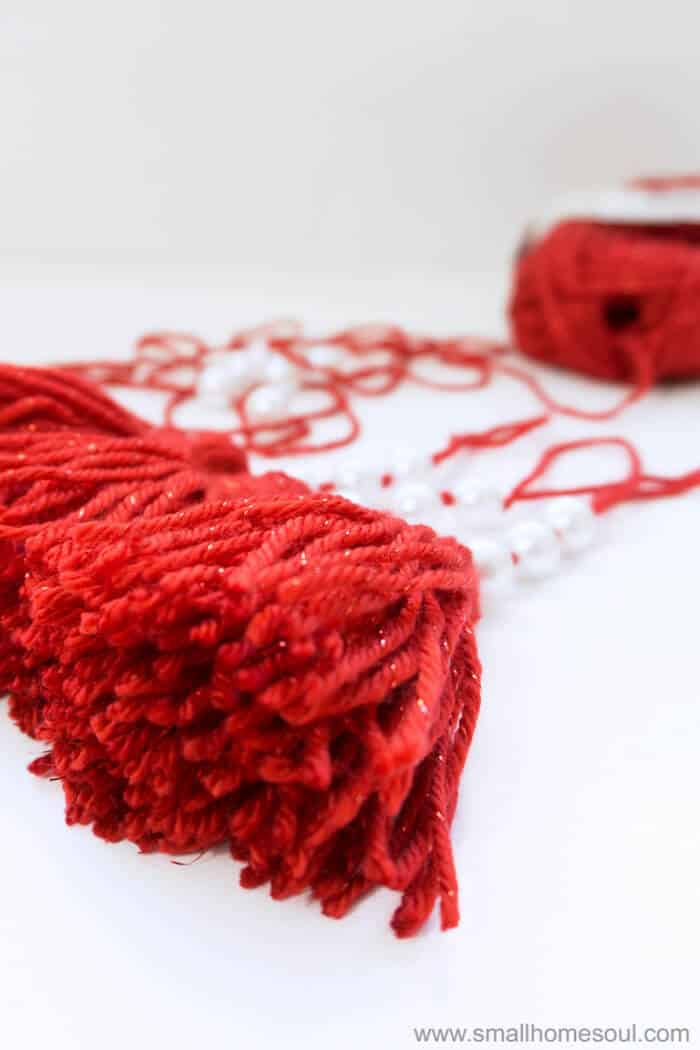
Wrapping the Tassel
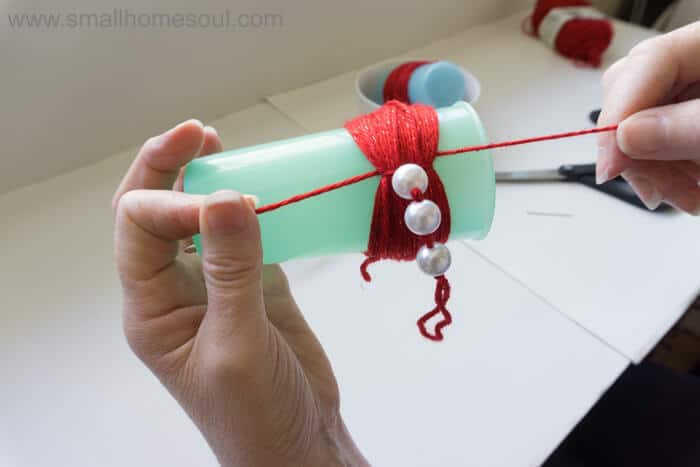
- Lay one long end of the Tassel Loop (without the needle) on the outside edge of the cup and slip the rest inside the cup to keep it out of the way.
- Wrap your Red Sparkle yarn around the cup 75 times (fewer times for a less full tassel) and clip.
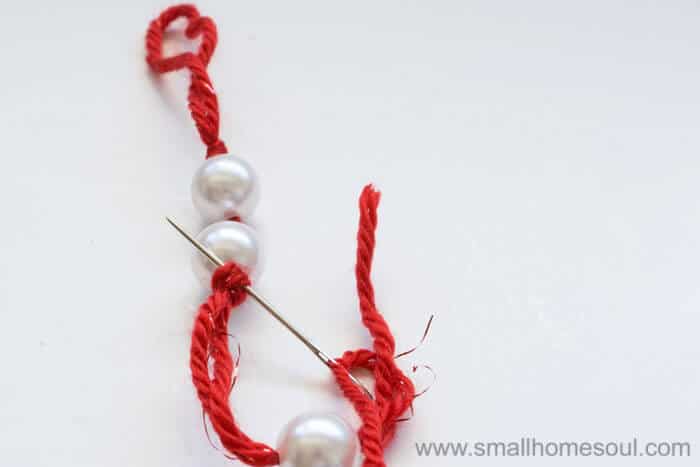
- Take the needle on the other end of the beaded section and slide it from the opposite direction under the yarn around the cup.
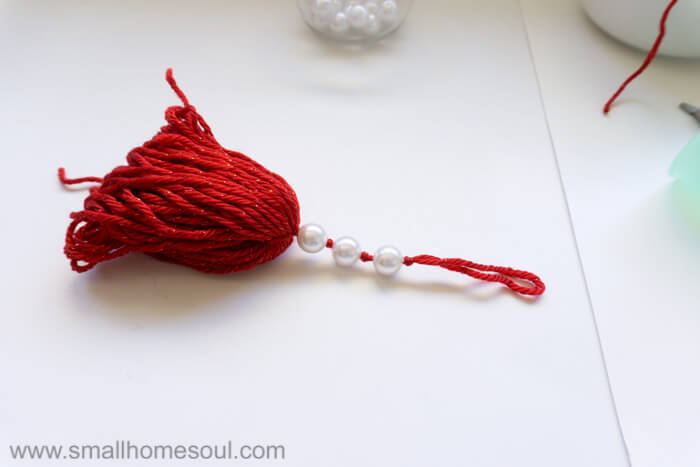
- Give the threads a good pull and hold them tight as you slip the loops off the cup.
- To keep the loops from getting tangled together until you get a good knot tied, slip the scissors or a ruler through the loops.
- Center the beads over the loops and make a good knot on the inside of the loops where it will be hidden.
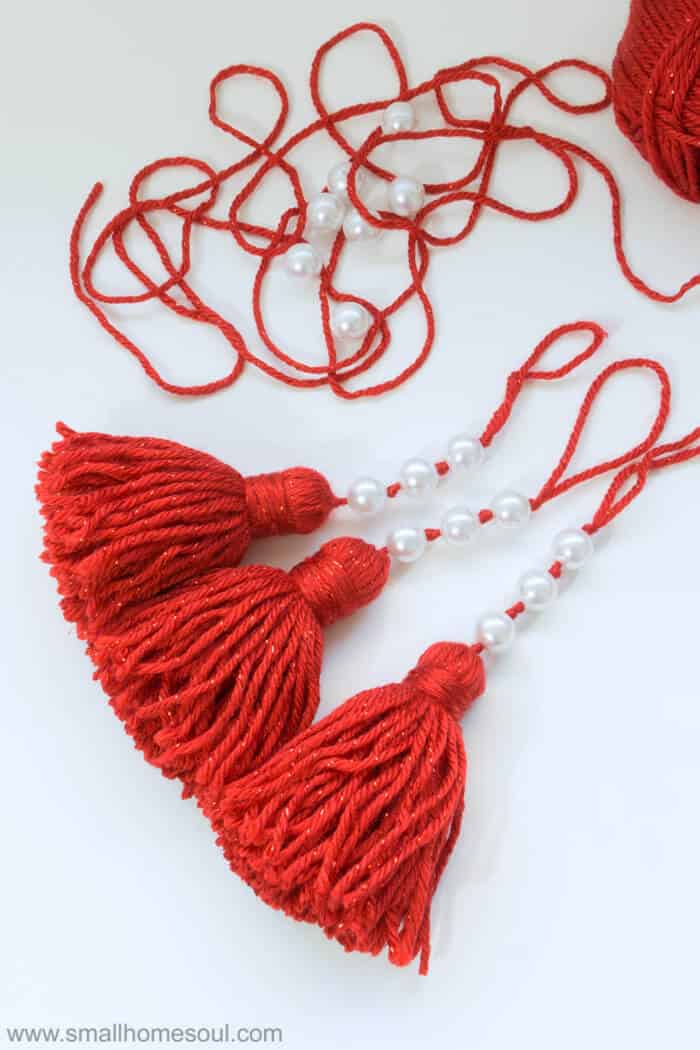
Tying the Tassel Ornament Neck
This is where your Christmas Tassel Ornament really starts to look like a tassel.
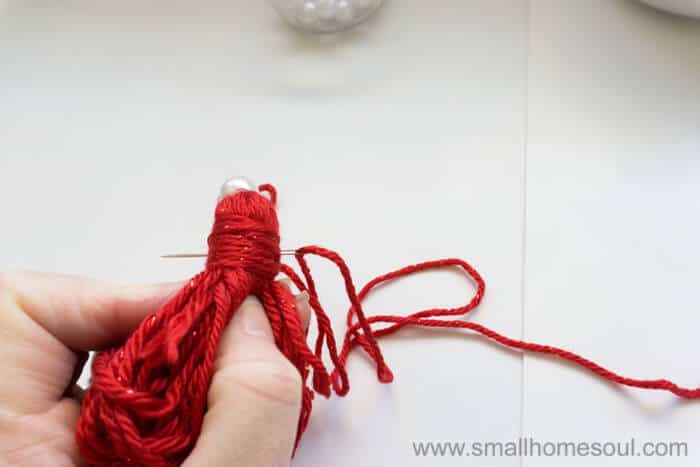
- Thread an 18″ section of yarn.
- Holding the tassel by the beads smooth out the yarn. Then squeeze your thumb and index finger around the tassel about 1″ from beads.
- Wrap the loose end of yarn tightly around the neck of the tassel about 15 times.
- To tie off push the needle through the middle of the neck you just wrapped. Pull tight and press with your thumb.
- Wrap 3/4 turn and push the needle through the middle again. Do this one more time and trim close.
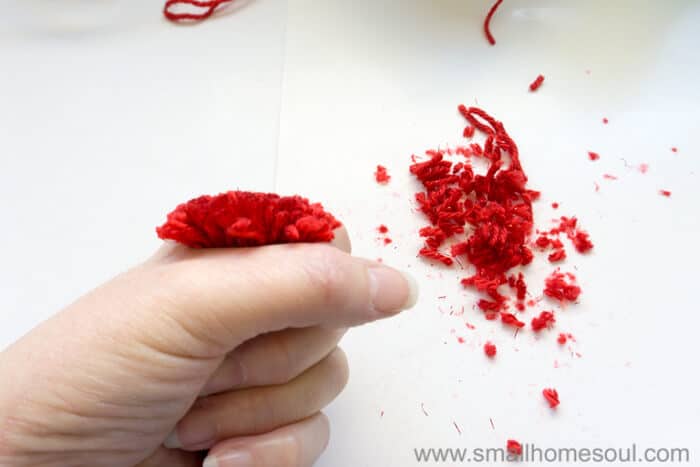
- Cut the looped ends of the tassles.
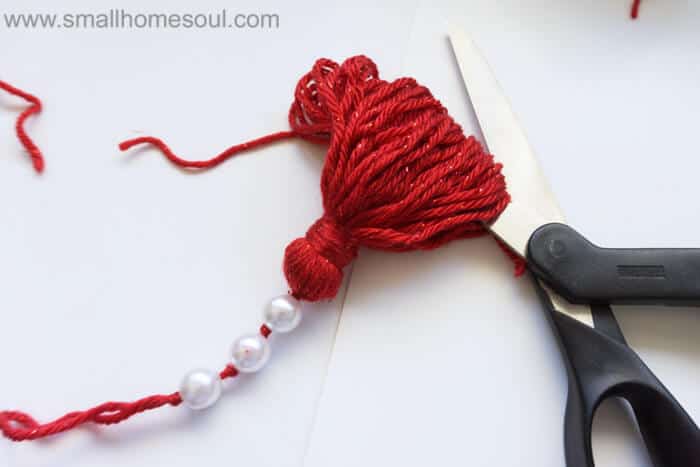
- Comb the yarn with your fingers to straighten.
- Squeezing the end of the Christmas Tassel Ornament in your hand and trim the ends.
And with that your Easy Christmas Tassel Ornament is complete and beautiful. Don’t you love the sparkly yarn?
You can make up several of these in a short time and give them at your next ornament exchange 🙂
Make them for your own tree, or as a beautiful addition to a wrapped present.
Making these ornaments with a closed loop at the top takes a little bit longer, but I think it’s worth the extra few steps. And I’m happy to report that Roseann loved her Christmas Tassel Ornaments. Yes, I sent her two because they were so easy to make.
Now for more inspiration, check out all the Ornaments below that were created for this Ornament Exchange.
FIND ALL 47 HANDMADE ORNAMENT TUTORIALS BELOW AND SHARE YOURS TOO! Use Hashtag #2017OrnamentExchange so we can see your creations on social media.
Susie
Monday 1st of January 2018
I don't know how I missed reviewing the tutorial for this neato tassel ornament, but so glad I stopped by today. It's so adorable and so easy to make any color in the universe. Love the elegance the pearls add, too. It's a fabulous idea! Thanks so much for sharing1 ~~ Susie from The Chelsea Project
Hil
Wednesday 29th of November 2017
I've never made a tassel before. It looks so pretty for the tree.
I pinned to my group board. Love participating in the Ornament Exchange I get such amazing ideas!!
Debbie Lynn Pearl
Wednesday 29th of November 2017
I just love that you could make so many of these and there is such pretty yarn to try this with! Sharing on pinterest!
Emily
Friday 24th of November 2017
Love your tassel ornaments! They're so pretty!
Erlene
Friday 24th of November 2017
These yarn tassels are lovely. I like how you added little pearls to dress them up. This would match our tree too!
Toni Harvey
Tuesday 2nd of January 2018
Thank you Erlene, and thank you for having me in the exchange, it was so fun. I'm sorry for the late response, apparently I wasn't getting notifications of new comments. I can't wait for next year's exchange!